Strickmich! Club Countdown
Signups for Strickmich! Club are closed for 2014! Thanks a lot to everyone who participates.

In da Club IV: Heike Rehfeldt / Wollkenschaf
|
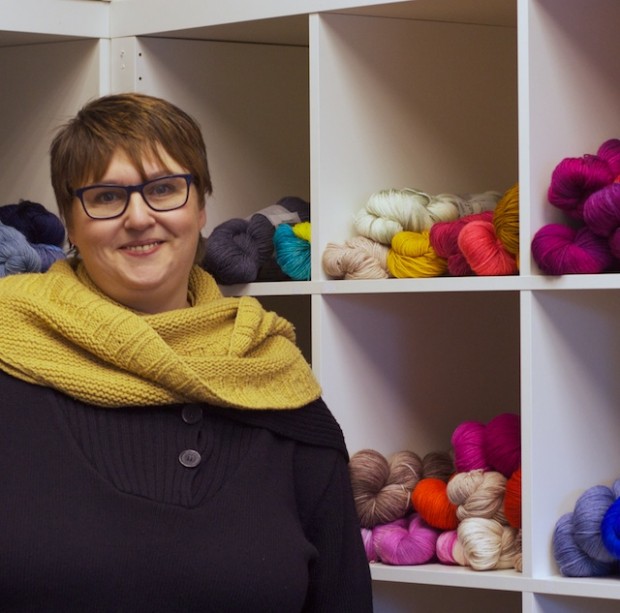 |
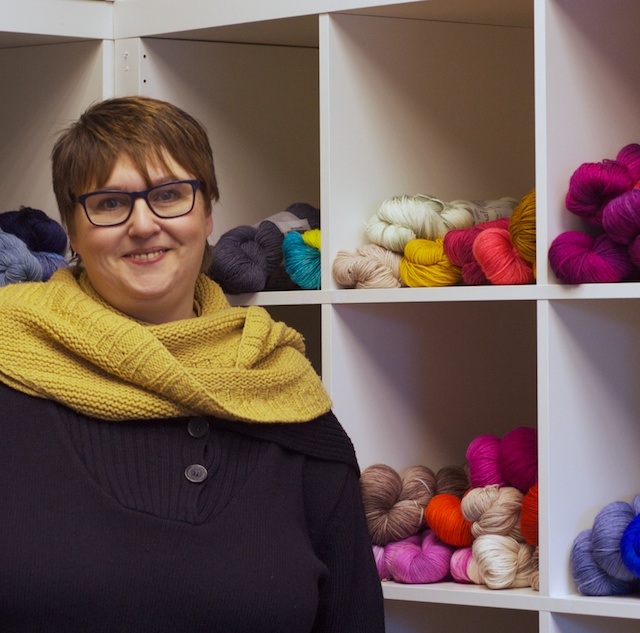
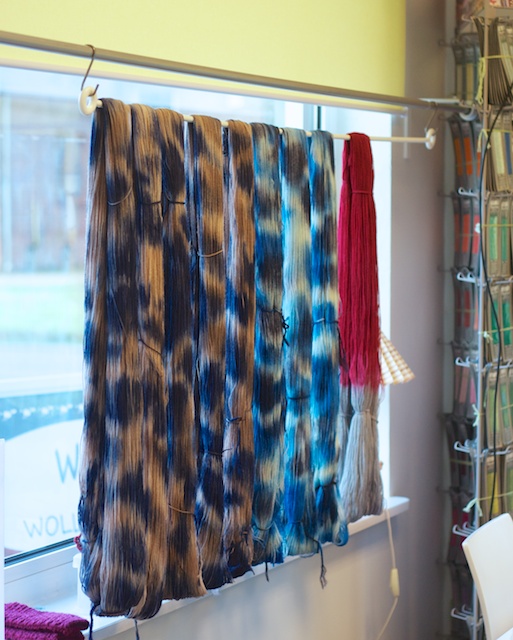
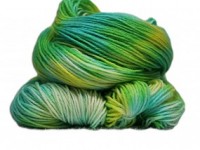
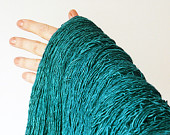
And here, finally, is our fourth dyer for Strickmich! Club: Lovely Heike Rehfeldt and her Wollkenschaf-yarns! (“Wollkenschaf” is a word play in German, meaning something like “the cloudy, woolly sheep”.) When a friend of mine showed me the beautiful skeins she got at Heike’s shop, I knew I needed some of that, too. Heike enjoys experimenting with colors and interesting dyeing techniques, making the most astonishing multicolor and batik colorways. Her latest colors can always be admired by everyone who passes by her shop window in the little town Heede in Heede, in Germany’s most northern state Schleswig-Holstein:
Heike is originally from Berlin and earned herself a little pocket money as a kid by selling knitted lace table cloths. Today she usually knits her own yarns and prefers shawlettes, and the patterns do not have to be that complicated anymore: “On Sundays, I put my feet up, turn o the TV and knit – that’s my time to relax and enjoy myself!”, she says.
Heike started dyeing in 2011: “When I offered my yarns for the first time in my local yarn store, the feedback was great – everyone wanted them”, says Heike. Her son Paul helped her set up a website for selling the yarns online, and since then those little “cloudy sheep” have been flying to their new, happy owners. In summer 2013 Heike found that she had to make a decision: It took her to much valuable dyeing time to keep her little shop open all the time. Also, the tiny kitchen in that shop was too small for serious dyeing.
Heike decided to move her workshop to the countryside and concentrate on dyeing – good for us knitters! And good for her, too: “I am so happy that I moved here!”, she says. She enjoys the time she spends here experimenting and developing new colors that will become available as “single sheep” in her online store. If you want to enjoy her yarns live, you are welcome to have a look: Her store is open every two weeks, and you will find it hard to choose between all those beautiful yarns, among them luxury yarns with cashmere, alpaca and silk.
|

|
|
|
 |
 |
Heike has agreed to create a new color with a special yarn for Strickmich! Club , and I am really looking forward to it!
In da Club III: Claudia Hoell-Wellmann aka Wollmeise

 |
 |
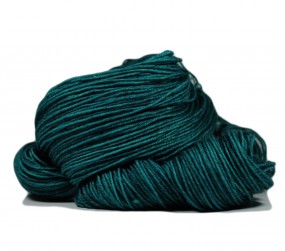
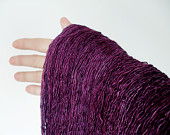
Claudia Hoell-Wellmann and her “Rohrspatz & Wollmeise“-yarns hardly need an introduction, because her beautiful color-creations are well known and appreciated by knitters around the globe. Since I came across my first skeins of Wollmeise six years ago, I have been hooked: They are smooth, shiny, the multicolor skeins surprise me every time and they are dyed with an eye for perfection that is hard to match. Claudia’s special sense of color can also be found in her semisolid skeins that very often are just the color that one has been looking for so long. “I just love to be spontaneous and develop new colorways, that’s what I like best about dyeing yarn!”, Claudia says. Her favorite color changes according to her mood and new colors often come to her mind after she has experienced something new. Her latest color is inspired by her cat, Xaverl, who has been residing in Wollmeise’s home for a couple of months now. Claudia has developed her yarn bases herself, in cooperation with spinneries in Europe. “I wanted yarn that does not pill, shows my colors brilliantly and has good stitch definition”, Claudia says. I am not the only knitter who loves to work with her yarn bases, so I really, really hoped to have a Rohrspatz & Wollmeise yarn in Strickmich! Club. And well, dear friends of Wollmeise: She said yes! Claudia has agreed to dye a new, special colorway just for Strickmich! Club.

A charming audience at Wollmeise’s shop
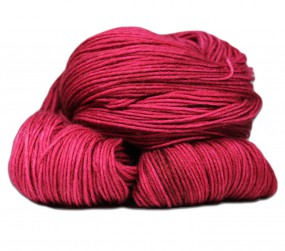
On Saturday I had the pleasure to hold a little reading at Wollmmeise’s Shop in Pfaffenhofen (Bavaria), and those who attended already got the big news! I also had a little trunk show with my designs which are 80 percent Wollmeise. I can’t help it: very often I see a skein and just know what I want to make. Or I have a special shape in mind that will work in garter stitch and would just be perfect for one of those multicolor skeins – just like “Hitchhiker” that I knit with one skein of “Red Hot Chili”:
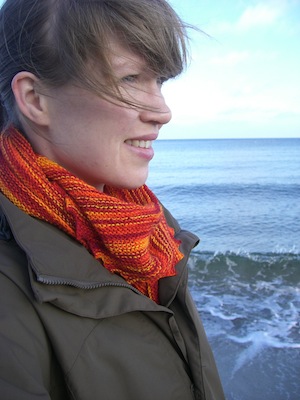
The very first Hitchhiker, made with Wollmeise
Claudia started dyeing yarns in 2002 with Kool-Aid. “Before that, I used to spin my own yarns from different colors of roving because I wanted to achieve a very special color – but dyeing was so much faster and I knew: That’s it!” When she started using professional dyes, one of her first attempts was “Regenbogen” (“Rainbow”), that is not very easy to dye: “But I really wanted that one to work out!” Claudia always strives to dye the perfect skein, no spots, no knots, no mistakes – her perfectionism is legendary. And the little miracle that occurs when the colors of a multicolor-skein form perfect little stripes on your sock is her reward. Claudia has been selling her yarns since 2004, in the beginning only on markets, later online.
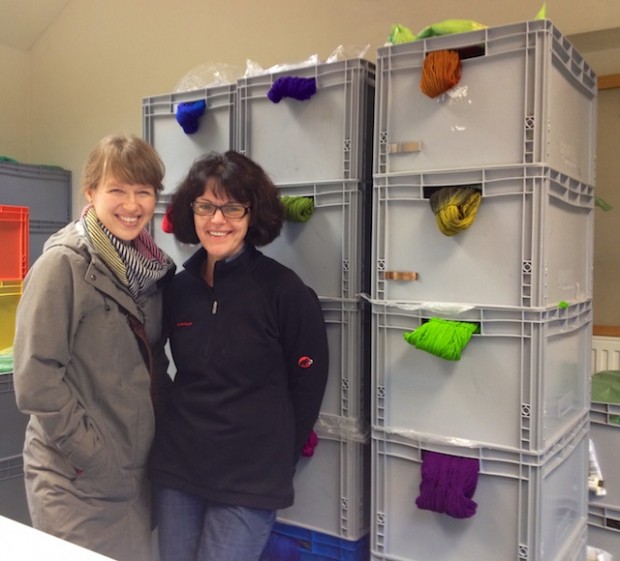
Thanks to Ravelry, knitting blogs and podcasts very soon almost every knitter on the planet knew about those special yarns from Bavaria. The demand for Wollmeise grew, every update in the online shop was sold out within minutes. Claudia had to expand – and get help. Her husband Andreas (“Rohrspatz” – German “sparrow”) is head of the office, finances and organization, women with good eyes check the quality and colors of every skein on a big table in a well-lit room, and friendly helpers answer customers’ e-mails, so Claudia can focus on her dyeing in her workshop. In 2009 she opened her real-life store in Pfaffenhofen. A year before that she had moved her business out of her house to a workshop just outside town (that’s where we took the picture of us at the top!). On Sunday, Claudia showed me around a little bit, and I felt like a kid in a candy store:
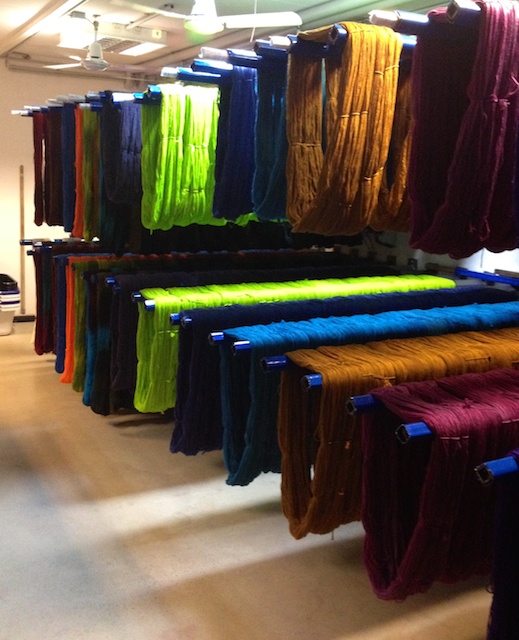
Yarns drying in the basement
When the yarn is controlled, twisted, labelled and beautifully arranged in her shop, it’s just irresistible:
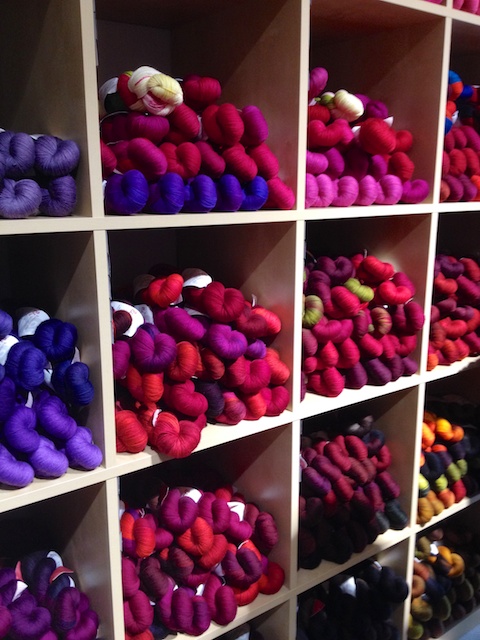
The red “Twin” corner in Wollmeise’s shop
As a designer, I am especially pleased that Claudia herself knits my patters, although she really does not have much time to knit. She has made several Hitchhikers and this spectacular Nuvem:
Claudia’s very own Nuvem
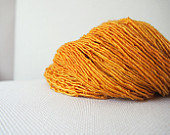
She dyed the yarn for this one herself, with a special method: First, she knits the undyed yarn with her knitting machine, then dyes it and rips it all out – this way, the beautiful stripes are created. At the moment, Claudia is working on her second Nuvem (with beads!) in a warm, rusty orange yarn with alpaca and mohair that is not from her workshop. “This Nuvem is supposed to really feel like a cloud, so I needed some other yarn”, says Claudia. She usually knits when she is at the shop. “I knit only a little, but enjoy it very much. Except when I really, really want to finish something!”
I had the most wonderful weekend in Pfaffenhofen – thanks again to all knitters who were there, and to Claudia’s great team! I am really looking forward to the cooperation between Rohrspatz & Wollmeise and Strickmich! Club. I hope you are, too!
In da Club II: Nicole and Cordula / DyeForYarn


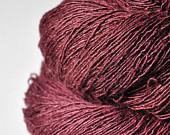
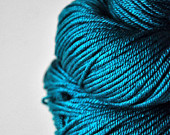
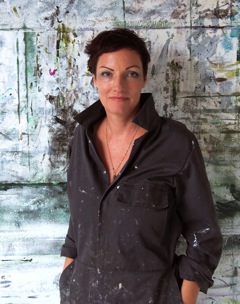
Silky, shiny with intense, saturated colors – yarns like that are true gems and hard to find: silk fibers do not take the pigments handdyers use very well. But Nicole Eitzinger (left on the picture) and Cordula Surmann-Schmitt of DyeForYarn have found a way to dye silk and silk blends in very vibrant colors. When I was looking for special yarns for our Strickmich! Club, I was very impressed with DyeForYarn’s samples: Great colors and really beautiful, soft yarn bases with silk, merino or camel, hand-picked by two very ambitious knitters. “When we think about taking on a new yarn base, we test-knit it and wash and wear it for some time. We want to know how a yarn feels, whether it felts and so on”, says Nicole.
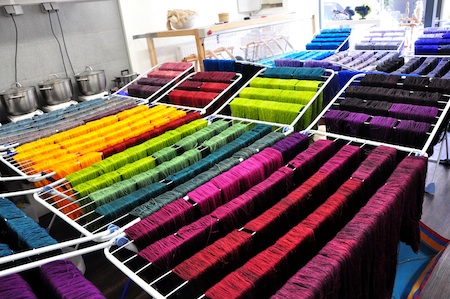
Beautiful yarns drying
Nicole and Cordula met at University where they worked in the same lab for four years – Nicole is a biologist, Cordula studied molecular medicine. In 2009, Nicole felt like knitting again (after abandoning it for a couple of years) and chose a lace shawl as her first project. That became a gift for her mom, so she knit another one for herself. When Cordula saw Nicole proudly wearing her newly knit treasure, she decided that she needed one, too. Since then, they both share a passion for complicated lace: “I just love a challenge when I knit, and Cordula feels the same”, Nicole says. A couple of years ago, lace yarns in nice colors were kind of rare in German yarn stores, so they started dyeing their own and selling them in their Etsy Shop. In 2011 they opened the DyeForYarn Store in Fürth (close to Nuremberg, Bavaria) and quit their jobs at the lab bench.
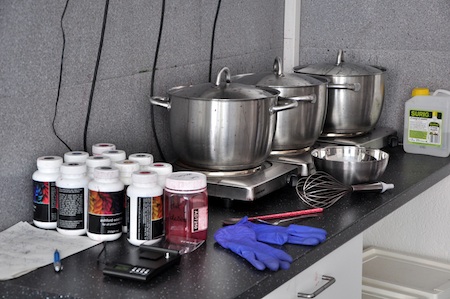
Nicole’s dyeing spot
Do they miss academic life and work? “Not at all! It is so exciting and challenging to run one’s own business. We enjoy being the bosses and making decisions – that’s something you can’t always do working in science. But the best thing is: there are no dead ends in dyeing yarn. If a color does not turn out exactly the way I planned, there will be someone who loves it nevertheless!”, Nicole says. Some things they learnt in the lab transitioned to the dye workshop, nevertheless: Two separate, neat and clean working stations, exact notes and, in Nicole’s case, recipes for every color she dyes. “I always weigh everything, Cordula is a little more of a free-hand-dyer”, Nicole says. Each one has her specialty colors, and their joint range of color is very impressing.
I am very delighted that Cordula and Nicole have agreed to do one special color for Strickmich! Club. They immediately agreed, although I will not be designing their beloved extra-complicated lace for the club. “Our customers love to knit Martina’s patterns with our yarn. It’s a perfect match!”
One more question for our yarn scientists: Why did you choose a pirate symbol as a logo? The answer: “It goes very well with the double meaning of ‘DyeForYarn’ and the black humor that we share. And we are both fans of ‘Pirates of the Caribbean!'”
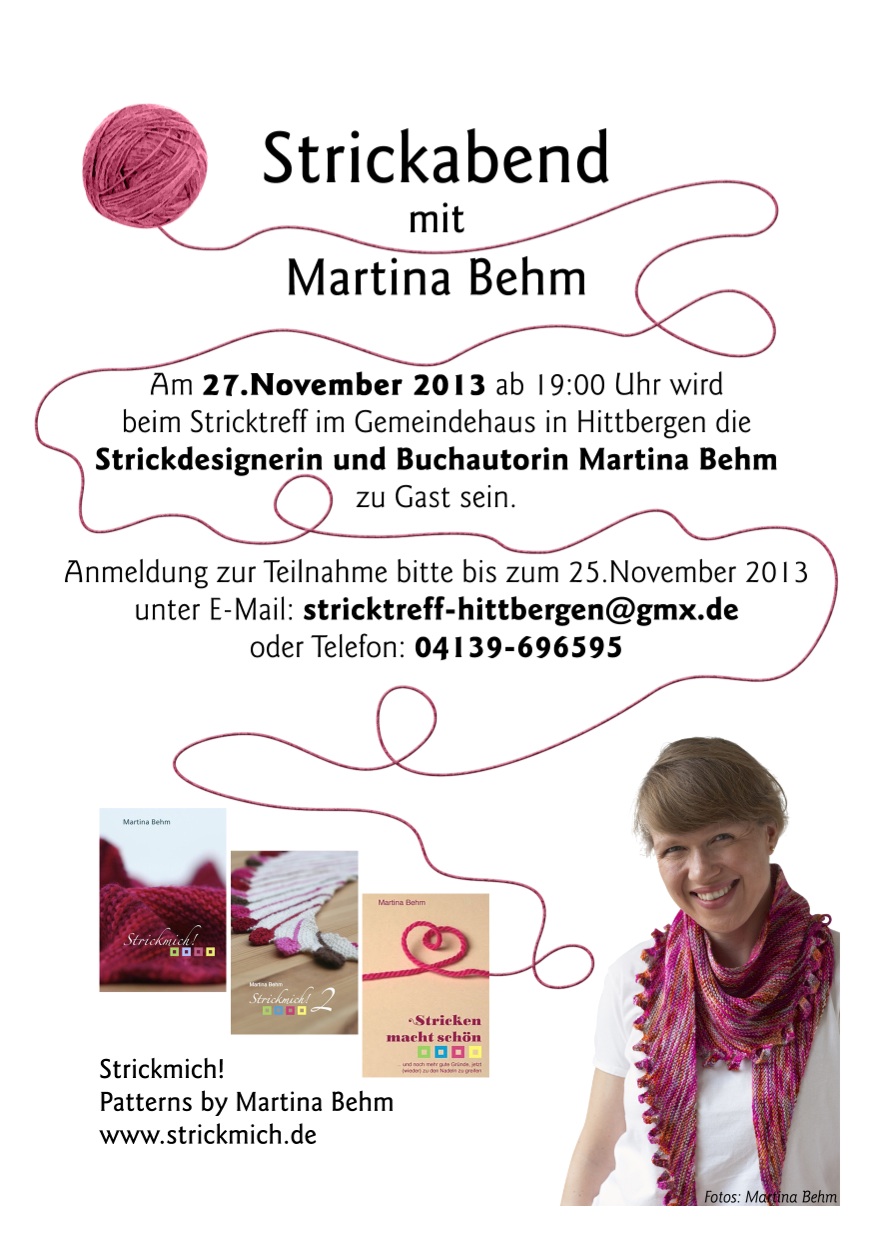
A little reading
I will be doing a little reading in a small town near Hamburg on 27th Nov:
In da Club I: Miriam Jarrs aka welthase

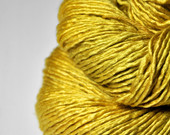
When I started thinking about Strickmich! Club, “welthase” yarns were on the top of my list. I had a couple of skeins that I found in my favorite yarn store (Mylys in Hamburg). Those yarns had a subtle, soft shine to them and intense but delicate colors – just beautiful! I had also browsed welthase’s Etsy Store and found that Hamburg artist Miriam Jarrs was the creative force behind welthase yarns. An internationally successful artist – I felt a little intimidated about asking her to join my club. What would she think of that? Would she have the time for dyeing yarn for my club in between gallery openings in London and work at her studio in Hamburg?
One morning, I sent her an e-mail and shortly after my phone rang: It was Miriam! She loved the idea of a yarn club using my patterns and said she would very much like to participate. She spontaneously invited me to come over and have a look an her yarns. An hour later I sat comfortably in her living room, sipping tea, admiring pretty yarns and colors – and talking to a passionate knitter and dyer: “I just love to knit, and I am addicted to colors and yarns!” Miriam always has very special colorways in her mind when choosing yarn for her projects, and those are not so easy to find. So she started dyeing her own a couple of years ago: “I love the sensuality of the whole process. It’s exiting! Will it turn out the way I wanted it to be?” As an artist, Miriam has a special way to deal with colors and a lot of experience. She knows about the moods that colors evoke, and she knows which pigments to mix to achieve a certain effect. Miriam feels that dyeing yarn and painting are creative processes that stimulate each other: “Lately I started on a painting, completely different from my other beginnings and stopped, it seemed to lead nowhere. I decided to start dyeing yarn – and there it was, a stunning new colour, a new way of dyeing… Now I can’t wait to go on with my painting again, because now I know how to continue.”
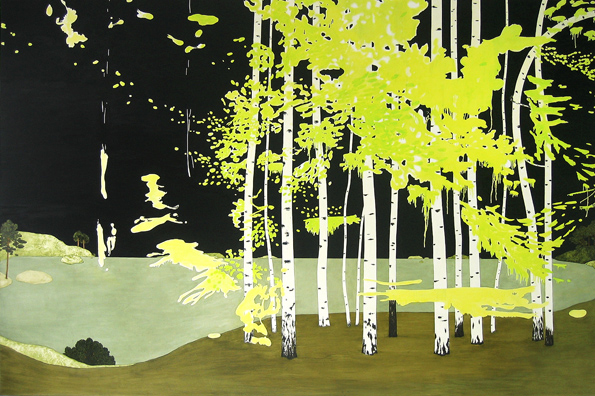
“golden” painting by Miriam Jarrs (2008, 200 x 300 cm, oil on canvas)
In her paintings, Miriam works from light to dark, such that the picture remains abstract until it is almost finished. The lighter shapes are formed by painting their dark surroundings as a contrast, not by painting the light objects themselves. That way, her works receive their very special glow. And that kind of glow can also be found in her yarns:

Miriam has agreed to dye such a very special, glowing color for our Strickmich! Club. I can’t wait!
Oh, and one more question for our dyer-artist: Why is her yarn label “welthase” (German: “world-bunny”)? That’s not really yarn-related, is it? Miriam’s answer is as original as plausible: “I love the picture of something so cute as a rabbit or hare, imagining itself as being cosmopolitan and very much at home in the endless universe, sitting there calm and comfortable, knitting away.”

There will be … a Club!
Very big news: In 2014 there will be a Strickmich!-Club! I will design four patterns for the club, and they will be delivered each with a special hand-picked, exclusively hand-dyed yarn from the most talented hand-dyers in Germany. It is so exciting! During the past couple of weeks I have met and talked some dyers whose yarns I love, my husband Peter has reviewed offers and has juggled with prices and shipping options. We also got lots of useful feedback from knitters about the idea of having a club – thank you for that! When it became clear that not only we, but also knitters and our preferred dyers were keen on participating in our project, the numbers made sense and it looked doable we decided: Yes, there will be a club! My husband Peter will be in charge of the organizing and shipping (he has already exported German beer from Hamburg to Colombia and the U.S. and will make sure every member gets her packages), I will contribute my designs and the dyers will deliver their very beautiful yarns. Very soon I will be able to tell you more about the details of the club and who the participating dyers are. As for today, I can only say that two of them are from northern Germany, two are from the South and each of them is very unique!
P. S.: We are planning to have the signups in early December 2013 and the first shipment in February 2014. Do not worry, we will let you know in time!
Designing – III
My Design Process – Part III
Knit (this time for real).
I know that many designers let others knit their samples to save time – but that’s one thing I would never do! I just love knitting my own designs. I am thrilled when I see that something does indeed turn out as planned. Also, knitting time is very important during my day. There are just some moments when I need a break from working on customer e-mails, layouting and fiddling with photographs. And although it makes me a slow designer and I cannot publish as many patterns, I also think it is necessary that I do my own sample knitting: Despite all the planning, calculating and knitting of mini-versions, there will always be little surprises along the way which I can change during the process. Very important: Taking notes during the knitting! These notes will be the basis for pattern writing later on. When the knitting is done (depending on the size of the project this takes between 2 and 6 weeks), I will weave in the ends and wash and block it, because I want the finished item to look its best on the pictures.

Taking Pictures.
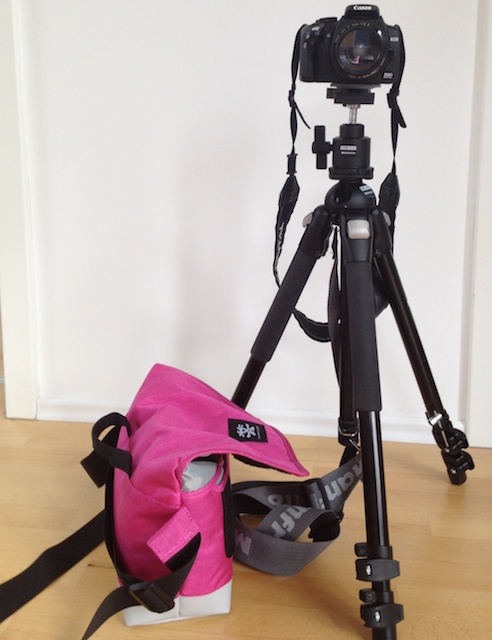
Although I am no pro in this field, I do all my photography myself. When I started, I used a tiny digicam, but for some time now I have been using the big Canon 350D that my husband bought ten years ago. At first I would not believe it, but it is true: A bigger, better camera makes much better pictures! Most of the time I use a 50mm-lens without any zoom or wide angle features. I may have to climb and crawl to get the best perspective, but I just love the pictures it makes. They are brighter and when photographing objects, the background is attractively out of focus (yes, I know, I could just change the aperture, but I like them that way). I use a tripod and a remote control when I model myself. Also, on those days I make sure that my hair is clean and coiffed, I do wear make-up and my T-Shirt is ironed (on other days, I might be more relaxed about those things). I have a certain corner in my room next to the window that I use as a neutral background. I have to move my bed to be able to stand there, also I will vacuum the floor for the close-up and total shoots of the object.
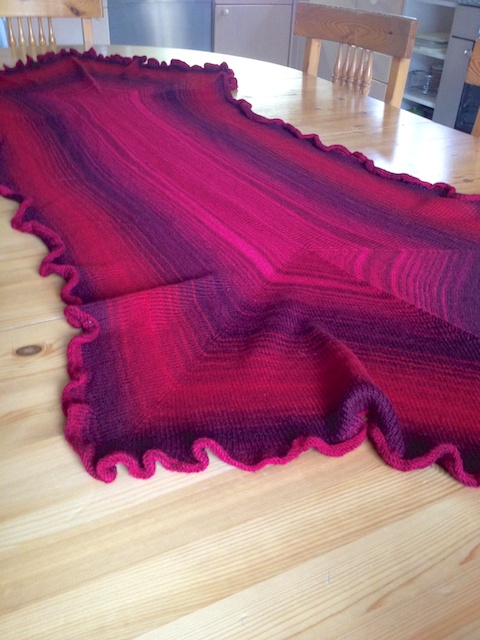
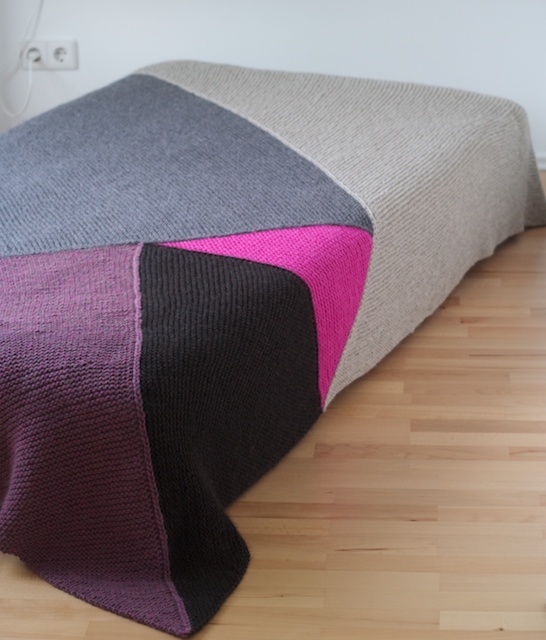
When photographing “Angles” that was not necessary because my bed was the model. I just had to move it to find the best way to present my knitted bedspread. I usually take as many pictures as possible, because that way it is more likely that one of them will be nice. Also very important: A fully charged replacement battery for the camera. It would be much too annoying to run out of battery power during a shoot (after setting up everything) and having to wait until the battery is charged again. At this point I would like to thank my husband who has assembled all this photo gear which is really a pleasure to use and I am grateful he lets me use it!
When all pictures are taken, I download them to my computer and use image editing software to make them pretty. I just recently upgraded from iPhoto to Aperture (they are both from Apple and much cheaper than Photoshop & Co.). Firstly, I delete all pictures that are out of focus or that I do not like the way I look on. That’s at least 50 percent. Then I fiddle with the white balance, color saturation and cropping. I will also kindly get rid of any visible blemishes on my skin using the retouching tools of my software. Then they are downsized so that they will be the right size for the pattern and my website.
If you want to learn more about photographing knitted objects, I highly recommend Caro Sheridan’s class “Shoot it” on Craftsy.
Pattern Writing.
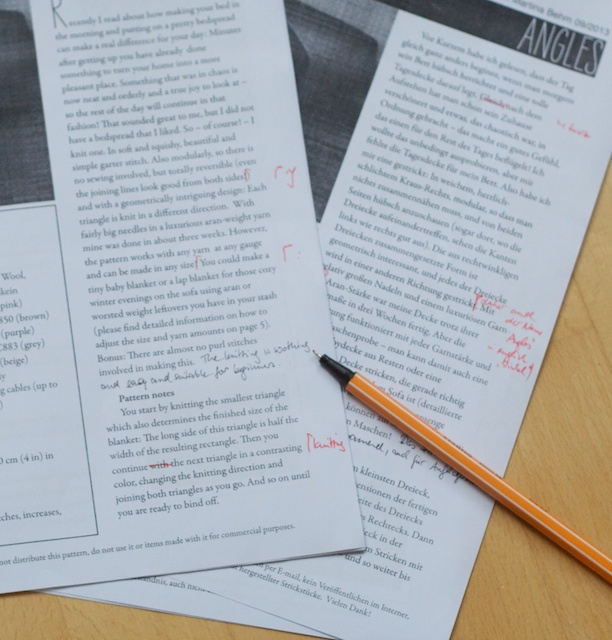
When I have the pictures I want to use, I start writing my pattern on the computer using a simple layouting program. I have template I use and that I adjust every time. I put the pictures in first and then start writing, because I need to see what I am writing about. I do pay much attention to measurements, materials and abbreviations. Also, when I use a special technique, I shoot photo-tutorials and video-tutorials in English and German using my tiny camera and a rubber tripod. Also, I draw a schematic on the computer that is included in the pattern. I always do the English version first although English is not my native language (as you can probably tell) because the knitting lingo is so much simpler and more logical in English. Then I translate the instructions into German, print everything out, read and re-read them and knit another two mini-versions using both language versions and make the necessary corrections. That process can take a couple of days. When making a pattern for a garment in various sizes or designing for a magazine, at this point a tech editor would read the pattern and have a close look at the numbers.
Publish.
Now the magic Moment is here: I put up an entry for the pattern on Ravelry, upload the pictures and set a price. I also let knitters know via facebook, twitter and my blog that I have created something new, looking forward to every comment, heart and pictures of works-in-progress!
Answering Questions
When knitters ask questions about my pattern via E-mail or on Ravelry, I will gladly help them. Sometimes I do not get around to it on the same day, and questions posted on weekends usually have to wait until Monday. Nowadays I spend about half an hour a day replying to customer requests.
That’s it! I hope you found this mini-series about my design process enjoyable.
Designing – II
My Design Process – Part II
Swatch (if required).
Yes, sure, you have heard it before: Swatching is a necessary prerequisite for knitting and designing. That said, I have to admit that for my shawlette designs, I rarely swatch at this point, because I usually knit Mini-Versions later in the process. Also, gauge is rarely relevant when making shawls or shawlettes. However, when I design things that should fit a certain part of the body (like socks, hats, mittens), knowing gauge is essential, and I will do the necessary swatches. When working with certain yarns that I have used a million times before (Wollmeise Pure!) I will just take any finished project and measure my gauge on that. But with a new yarn and especially when designing garments, you will need to make a sufficiently large swatch that you can count the stitches on to plug them in your calculations in the next step.

Calculate.
If a new project consists of several parts (like my modular blanket) some calculations will be necessary. Mainly to get an idea about how much yarn will be used for the parts, how big they are going to turn out and how everything will fit together. With “Angles” all I needed was Pythagoras’ Theorem and some simple equation solving. But when designing a sweater, you will need to make detailed calculations to figure out the measurements and sizes using a spreadsheet (e. g. Excel, Numbers). If you plan on publishing a pattern, calculating all stitch numbers for all sizes you intend to offer at this point, because it gets more difficult later on. I am really no expert on garment design and still learning, so I cannot give you any useful advice here. But there are several good books that will teach you how to do the calculations for garments:

“Knitwear Design Workshop” by Shirley Paden,
“Sweater Design in Plain English” by Maggie Righetti,
“The new Knitter’s Template” by Laura Militzer Bryant.
Knit (a bit).
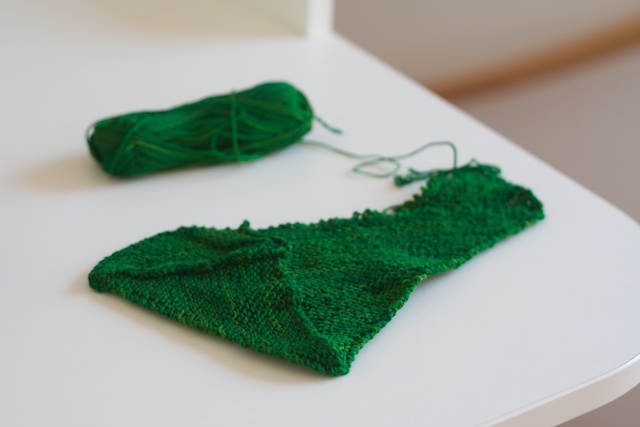
When I want to knit a new shape or a special edging (like the loops in Miss Winkle), I will knit a miniature version of my new Design first. I need to find out whether my idea works, whether my calculations are correct and if everything looks the way I expected. Unfortunately stitches are not square, so there is always an element of surprise to the process. And it’s so much better to frog a mini-version of my design than an entire shawlette or a huge bedspread. For the Mini-Version, I often use some yarn leftovers, not necessarily the one I am planning to use in the actual design. While I knit, I make adjustments to the notes in my sketches. The picture above shows my mini-version of “Angles”.
Choose Yarn and Colors.
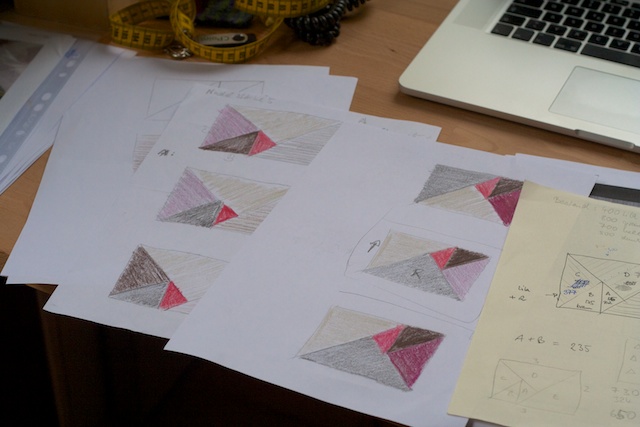
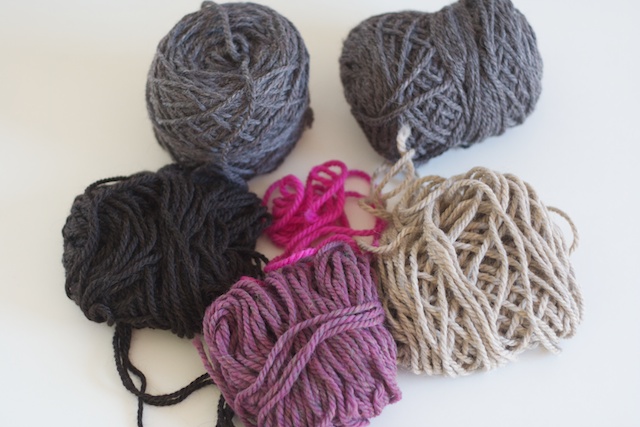
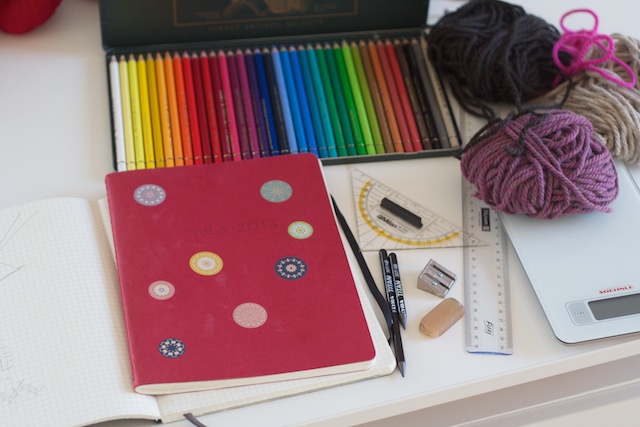
When I already know which kind of yarn I want to use, I now need to decide on the colorway. As I am usually wearing my prototypes on the pictures, I tend to pick colors that look good on me (pink!) – I will feel more confident during the shoot and tend to look more relaxed on the pictures. With Angles, I had to find the best combination of colors. I had one skein of the pink and seven skeins of the beige colorway of Artesano Aran in my stash, so I just went to the yarn store and picked some colors that looked good with those. The yarn is thick and soft and seemed perfect for a cozy blanket. I usually do not pay attention to availability of colors and the like, but if you are designing for a magazine or an internet publication, make sure you talk to the editor about what yarns would be okay to use. In order to arrange colors, I used my beautiful case of crayons and made lots of colored sketches until I found out which one I liked best.

Coming up in Part III: Prototype knitting, Photoshoot and Pattern Writing.
Designing – I

So what does the design process look like? I am sure that every knitwear designer has a different answer to this one. So here is what works for me:
The Idea.
There are different sources of inspiration. Sometimes I find some yarn that just begs to be something really special. Like this beautiful Wollmeise Molly (discontinued, unfortunately) in “Dunkle Kirsche”. I knew I wanted to make a cabled sweater with it, but could not find any pattern I liked. So I made “Joanie”, a pattern that was later published in Knitty.com.
I might also think about a special shape or a concept that I want to use for a particular finished item. It might be a geometric form I have seen in nature, on a building or in a picture: A long, narrow triangle, a long hexagon that could be knit without any purl stitches, a bias-knit hat. For my new pattern “Angles“, I wanted a rectangular shape that was composed of various triangles.
The Sketches.
Now I start sketching, using pencil and paper, sometimes compasses, a ruler, and always my eraser. I lack the routine of doing sketches on the computer – and I just love using old-fashioned drawing tools, pretty pencils and crayons. I feel like I am working on the intersection of art and geometry, which – in my view – is a place very close to paradise.
My favorite drawing tool is my thick “6B” graphite pencil in the front of the picture (I have used it so much that it is very short now and sadly will need a replacement). It makes soft, wide lines and is a joy to work with. For rough sketches, I use unruled Moleskine notebooks (a small luxury – and I think their size is just perfect) or I steal a couple of A-4-sized sheets from our printer. And for those cases where colored sketches are called for, I gifted myself that big beautiful case of colored crayons that can be seen in the back of the picture.
Now I start to scribble and draw and collect ideas: With pencil in hand, sometimes something very different emerges from what I first had in mind. With “Angles”, the challenge was to construct a rectangle using only triangular shapes that would grow modularly onto one another without any seams. It was an interesting puzzle that I enjoyed working on quite a bit.
By the way: There are a lot of ideas in my sketchbooks that did not make it to the next step: Shawlettes, sweaters, vests, jackets that did not spark my enthusiasm enough to take them to the next level.

Coming up in Part II: Numbers before needles – Start Small