Designing – III
My Design Process – Part III
Knit (this time for real).
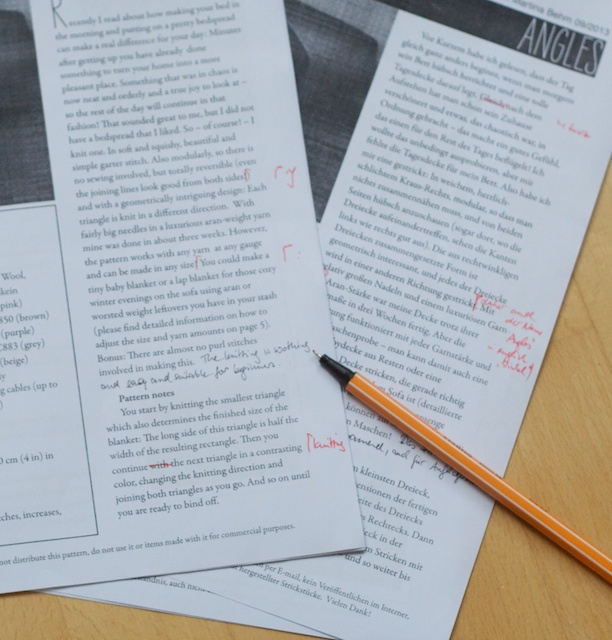
I know that many designers let others knit their samples to save time – but that’s one thing I would never do! I just love knitting my own designs. I am thrilled when I see that something does indeed turn out as planned. Also, knitting time is very important during my day. There are just some moments when I need a break from working on customer e-mails, layouting and fiddling with photographs. And although it makes me a slow designer and I cannot publish as many patterns, I also think it is necessary that I do my own sample knitting: Despite all the planning, calculating and knitting of mini-versions, there will always be little surprises along the way which I can change during the process. Very important: Taking notes during the knitting! These notes will be the basis for pattern writing later on. When the knitting is done (depending on the size of the project this takes between 2 and 6 weeks), I will weave in the ends and wash and block it, because I want the finished item to look its best on the pictures.
Taking Pictures.
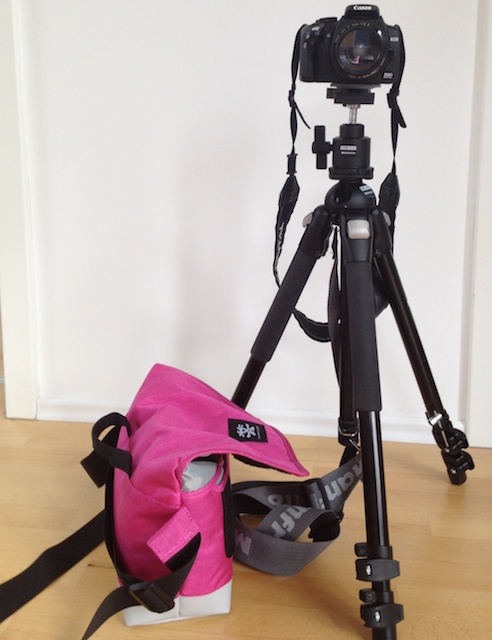
Although I am no pro in this field, I do all my photography myself. When I started, I used a tiny digicam, but for some time now I have been using the big Canon 350D that my husband bought ten years ago. At first I would not believe it, but it is true: A bigger, better camera makes much better pictures! Most of the time I use a 50mm-lens without any zoom or wide angle features. I may have to climb and crawl to get the best perspective, but I just love the pictures it makes. They are brighter and when photographing objects, the background is attractively out of focus (yes, I know, I could just change the aperture, but I like them that way). I use a tripod and a remote control when I model myself. Also, on those days I make sure that my hair is clean and coiffed, I do wear make-up and my T-Shirt is ironed (on other days, I might be more relaxed about those things). I have a certain corner in my room next to the window that I use as a neutral background. I have to move my bed to be able to stand there, also I will vacuum the floor for the close-up and total shoots of the object.
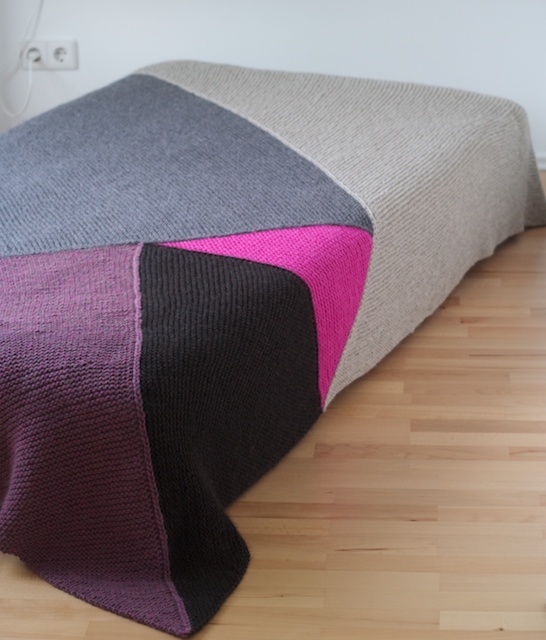
When photographing “Angles” that was not necessary because my bed was the model. I just had to move it to find the best way to present my knitted bedspread. I usually take as many pictures as possible, because that way it is more likely that one of them will be nice. Also very important: A fully charged replacement battery for the camera. It would be much too annoying to run out of battery power during a shoot (after setting up everything) and having to wait until the battery is charged again. At this point I would like to thank my husband who has assembled all this photo gear which is really a pleasure to use and I am grateful he lets me use it!
When all pictures are taken, I download them to my computer and use image editing software to make them pretty. I just recently upgraded from iPhoto to Aperture (they are both from Apple and much cheaper than Photoshop & Co.). Firstly, I delete all pictures that are out of focus or that I do not like the way I look on. That’s at least 50 percent. Then I fiddle with the white balance, color saturation and cropping. I will also kindly get rid of any visible blemishes on my skin using the retouching tools of my software. Then they are downsized so that they will be the right size for the pattern and my website.
If you want to learn more about photographing knitted objects, I highly recommend Caro Sheridan’s class “Shoot it” on Craftsy.
Pattern Writing.
When I have the pictures I want to use, I start writing my pattern on the computer using a simple layouting program. I have template I use and that I adjust every time. I put the pictures in first and then start writing, because I need to see what I am writing about. I do pay much attention to measurements, materials and abbreviations. Also, when I use a special technique, I shoot photo-tutorials and video-tutorials in English and German using my tiny camera and a rubber tripod. Also, I draw a schematic on the computer that is included in the pattern. I always do the English version first although English is not my native language (as you can probably tell) because the knitting lingo is so much simpler and more logical in English. Then I translate the instructions into German, print everything out, read and re-read them and knit another two mini-versions using both language versions and make the necessary corrections. That process can take a couple of days. When making a pattern for a garment in various sizes or designing for a magazine, at this point a tech editor would read the pattern and have a close look at the numbers.
Publish.
Now the magic Moment is here: I put up an entry for the pattern on Ravelry, upload the pictures and set a price. I also let knitters know via facebook, twitter and my blog that I have created something new, looking forward to every comment, heart and pictures of works-in-progress!
Answering Questions
When knitters ask questions about my pattern via E-mail or on Ravelry, I will gladly help them. Sometimes I do not get around to it on the same day, and questions posted on weekends usually have to wait until Monday. Nowadays I spend about half an hour a day replying to customer requests.
That’s it! I hope you found this mini-series about my design process enjoyable.
Hi, ich bin erstaunt und begeistert – Hut ab – das Buch von Shirley Paden hab ich mir auch – allerdings auf deutsch – gekauft und bin inzwischen auch schon fleißig am selbst designen eines Pullovers für mich. Immer wenn ich was von dir lese, macht es mir wieder Mut und ich krieg so nen richtigen Leistungsschub (-: – DANKE!!!!
Vielen, vielen herzlichen Dank für diesen echt inspirierenden Eintrag. Das war wirklich spannend zu lesen. Bin selber ja noch ganz am Anfang einer Reise ins Design, aber es macht total Spaß!
Lustigerweise geht es mir mit den Sprachen genau so, ich muss das auch erst mal auf Englisch hinschreiben, bevor ich es dann in Strickdeutsch verwandle. Kommt mir irgendwie logischer vor.
Hast Du vielleicht einen Hinweis, wie das mit den Schemazeichnungen am Computer geht? Mit Musterprogrammen klappt es schon, aber daran scheitern bei mir bisher die größeren Ideen. Mit Bleistift und Lineal wäre das ja kein Problem ;-)
Vielen Dank jedenfalls schon mal für deine vielen Tipps hier!
Liebe Grüße aus dem Süden,
Margareta
So ein toller und informativer Bericht. Ich kann bestätigen, dass du Fragen zur Anleitung sehr schnell und ausführlich beantwortest, hatte seinerzeit welche zum Hitchhiker und da hast du sofort weitergeholfen! GlG, Martina